Account Setup
Account-wide configuration lives under Account Settings, reachable from the user menu (the avatar circle in the top-right of the page). Account Settings opens with a left sidebar that groups every administrative setting; the items below are organized by topic and reference their location in that sidebar.
Service Plan & Account Information
View details about your account:
- Service Plan: Current plan, signup date, and available features
- Account Information: Account name, administrator contact, and company details
Transfer & Expiration Policies
File Delivery Options
- Set maximum and default expiration periods for file transfers
- Configure how long transfers remain available after sending
- Default is typically 7 days
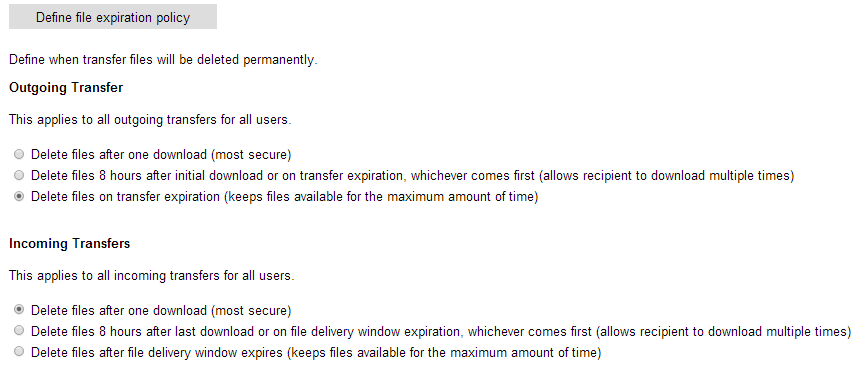
File Expiration Policy
- Define when files are permanently deleted from Leapfile's servers
- Set separate policies for outgoing and incoming transfers
- Choose from: immediately after download, after X days, or never expire
Incomplete Transfer Notifications
- Enable alerts for transfers that haven't been fully downloaded
- Set the number of days before notification is sent
Transfer Archiving
- BCC all transfer notifications to a specified email address
- Useful for compliance and record-keeping
- Archived copies include all transfer details and notifications
Note
File Expiration Policy changes only apply to future transfers, not existing ones.
Security & Authentication
Receiver Authentication Options
Choose which authentication methods senders can offer recipients. Each method can be enabled or disabled independently:
- No Security: Files are accessible via the link alone (least secure)
- Email Address Verification: Recipient enters their email address (the default)
- Email Verification Code: A one-time code is emailed to the recipient
- Security Question: Recipient answers a custom question the sender sets
- Guest Registration (Login Required): Recipient must register or log in as a guest user before downloading
- SMS Verification: A code is texted to the recipient's phone (available when sending from a Portal or Repository)
Default Receiver Authentication
- Set the default authentication method for all new transfers
- Users can override this when sending individual transfers
Upload Security
- Require registered guest accounts to send files to your users
- Prevents spam and unauthorized uploads
- Recommended for organizations with strict security policies
Email Verification Policy
- By default, external senders must verify their email address
- Disable verification to allow unverified uploads
- Recipients will see a warning if sender is unverified
Incoming Transfer Rules
Filter who is allowed to upload to your account by sender email. Configured under Account Settings → Transfer → Incoming Rules.
- Blocking Rules — glob patterns that deny incoming uploads (e.g.,
*@spammer.com,user?@*,*@{gmail,yahoo}.com). Patterns must contain exactly one@. - Exception Rules — glob patterns that override block rules. Use these alongside a broad blocking rule to create a whitelist.
- Rule Testing Tool — preview how any email would be evaluated.
Whitelist-only posture
To accept uploads only from known clients or partners: add Blocking Rule *@*, then add Exception Rules for each trusted domain (e.g., *@clientfirm.com).
Blocked senders see "Uploads from this sender are not allowed" and can request access, which emails the account administrator. Registered guest-account logins bypass these checks.
Standard Security Questions
Create a list of pre-defined security questions for senders to choose from:
- Scroll to Create standard security questions
- Enter your questions (e.g., "What is our project code?", "What city is our office located in?")
- Click Save
Users can then select from these questions when sending files.
Password Policies
The password policy lives at Account Settings → Security → Password and is configurable per account. New accounts default to modern NIST 800-63B-4 guidance: a longer minimum length, a check against breached passwords, and no forced character classes or periodic rotation. The available settings are minimum length (8 to 128 characters), optional uppercase/lowercase/digit/symbol requirements, a breached-password check, password reuse history, expiration, and the self-service reset toggle.
Whitespace is allowed in passwords and counts toward length, so passphrases work well. Existing accounts keep their previous settings until an administrator changes them; the new defaults are not applied retroactively. See the Password Policies guide for defaults, how rules are evaluated, and recommendations.
Self-Service Password Reset
The Allow users to reset their password toggle (Account Settings → Security → Password) controls whether users can reset their own password from the login page:
- Enabled (default): the employee login page shows a Forgot your password? link. The user enters their email, receives a verification code by email, and enters that code to set a new password.
- Disabled: the Forgot your password? link is removed from the login page. If a user reaches the reset flow another way, it returns "Password reset is not enabled. Please contact your administrator." and no email is sent. With self-service off, the only way to reset a user's password is for an administrator to do it from Account Settings → Users → Accounts (see Resetting Passwords).
Sign-In Verification (Two-Factor Authentication)
Leapfile supports app-based two-factor authentication (TOTP — the rotating 6-digit codes from Google Authenticator, Authy, Microsoft Authenticator, 1Password, and similar apps). In the product this is labelled Sign-In Verification.
At Account Settings → Security → Sign-In (full administrators only):
- Sign-in verification — check "Require sign-in verification for all users" to make two-factor authentication mandatory. Unenrolled users are forced through setup at their next login. Switching this on does not break logins for users who have already enrolled; switching it off does not turn it off for anyone who already enabled it.
- Remember this browser — set how many days a browser stays trusted after a successful code entry before the user is challenged again. Set it to
0to always prompt.
Sign-In Verification applies to interactive sign-ins (web, and SSO logins routed through Leapfile) and the desktop client. It does not apply to the legacy signed REST API. See User Accounts → Two-Factor Authentication for per-user enrollment status, the Reset action, and what happens when a user is locked out by failed sign-ins.
Single Sign-On (SSO)
Leapfile supports OpenID Connect SSO with Azure AD/Entra, Google, Okta, or any OpenID Connect provider, configured at Account Settings → Security → SSO. Users sign in with their existing company credentials and MFA is enforced by your identity provider. See the Single Sign-On (SSO) guide for setup.
Event Monitoring
At Account Settings → Security → Events, you can enable a pull-based REST API that streams your account's activity (transfers sent, files downloaded, and related events) so you can forward it into a SIEM or log pipeline — Microsoft Sentinel, Splunk, Cribl, or anything else that can poll a REST endpoint. Enabling it generates an API key (shown once, prefixed obs_); the page also shows a usage log of API calls. See the Event Monitoring guide for full details.
Inactive Account Policy
- Automatically disable user accounts after a specified period of inactivity
- Reduce security risk from dormant accounts
- Configured under Account Settings → Security → Sign-In (the Inactive account lockout setting); set the number of days of inactivity before accounts are automatically disabled. Hidden on single-user subscriptions.
Content & Feature Management
Secure File Transfer Site URL
- Change your company's Leapfile URL
- Format:
https://yourcompanyname.leapfile.comorhttps://yourcompanyname.leapfile.net - Contact support if you need to update this
Message Footer
- Create a standard HTML footer for all outgoing transfer notifications
- Add disclaimers, contact information, or branding
- Appears at the bottom of every transfer notification email
Feature Enablement
Enable or disable major features for all users:
- Repositories: Toggle internal file storage feature on/off
- Portals: Toggle external guest portal feature on/off
- Desktop Client: Toggle availability of the Leapfile Desktop Client (and its Outlook plugin) for your users
When disabled, users will not see the Repositories or Portals links in the top menu.
Tip
Use feature enablement to simplify the interface for users who don't need these advanced features.