User Accounts
Manage all users in your Leapfile account.
Adding Users
Add a Single User
- Go to Account Settings → Users → Accounts
- Click the Add User button
- Complete the required fields:
- Name
- Email address (becomes the username)
- Initial password
- Set permissions (see below)
- Click Save or Save & Add another
Import Multiple Users
- Go to Account Settings → Users → Accounts
- Click the Import Users button
- Download the CSV template
- Fill in user information in the CSV file
- Upload the completed CSV
- Choose one import mode:
- Add users only — create the new accounts in the file (default)
- Add users & disable the rest — create new accounts and disable any existing users not in the file
- Add users & delete the rest — create new accounts and delete any existing users not in the file
Rows with invalid email addresses, or that match an existing user, are skipped. There is no "update existing users" mode, and the three modes are mutually exclusive.
The 'disable/delete the rest' modes affect everyone not in the file
"Add users & disable the rest" and "Add users & delete the rest" act on your entire account, not just the CSV. A short or partial file will disable or delete every user it leaves out. Use "Add users only" unless you intend a full-roster replacement.
User Permissions
When adding or editing a user, you can grant the following permissions:
- Administer account: Full administrator access to all account settings
- Manage account setup: Ability to modify account configuration
- Send files: Ability to send transfers
- Receive files: Ability to receive transfers
- Create new repositories: Ability to create repositories
- Create new portals: Ability to create portals
- Manage portal guest users: Ability to create and manage guest accounts
- Manage user accounts: Ability to add, edit, disable, and reset passwords for users
- View account reports: Access to reporting features
Administrator Permissions
Grant administrator access only to trusted users. Administrators can modify all account settings, manage users, and access billing information.
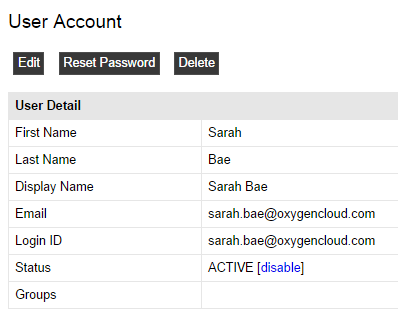
Editing Users
To modify an existing user:
- Go to Account Settings → Users → Accounts
- Click the user's name
- Click Edit
- Update information or permissions
- Click Save
Enabling/Disabling Users
Disable a User
- Go to Account Settings → Users → Accounts
- Click the user's name
- Click the Disable button at the top
Enable a User
- Go to Account Settings → Users → Accounts
- Click the disabled user's name
- Click the Enable button
Bulk Enable/Disable
- Select multiple users using checkboxes
- Click the Enable or Disable button at the top of the list
Info
Disabled users do not count toward your user limit and cannot log in to their accounts.
Resetting Passwords
To reset a user's password:
- Go to Account Settings → Users → Accounts
- Click the user's name
- Click Reset Password
Leapfile then generates a new random temporary password, emails it to the user (subject: "Password Reset"), invalidates that user's existing login sessions, and flags the account so the user must choose a new password at their next login. You need the Administer account or Manage user accounts permission, and the user must belong to your account.
Note
For security reasons, administrators cannot see user passwords. Resetting a password generates a new temporary one that the user must change at first login.
Self-service password reset
Users can also reset their own password from the login page's Forgot your password? link — unless an administrator has turned that off at Account Settings → Security → Password → "Allow users to reset their password". When self-service reset is disabled, the link is hidden and the only way to reset a user's password is the administrator action above. See Self-Service Password Reset.
Two-Factor Authentication (Sign-In Verification)
Leapfile supports app-based two-factor authentication (TOTP codes from Google Authenticator, Authy, Microsoft Authenticator, 1Password, etc.), labelled Sign-In Verification in the product. The account-wide policy (optional vs. required for all users) and the trusted-browser duration live at Account Settings → Security → Sign-In — see Sign-In Verification.
Checking and managing a user's enrollment
There is no single screen that lists every user's two-factor status — it's shown per user. Go to Account Settings → Users → Accounts, click the user's name, and look at the User Sign-In Verification card on the detail page:
- It shows whether that user is currently Enrolled.
- Resetting a user (uncheck Enrolled and save): clears the user's authenticator enrollment, recovery codes, and trusted browsers. They register again with a new device at their next sign-in, and are notified by email. Use this when a user has lost both their phone and their recovery codes.
- Administrators cannot enroll a user — first-time enrollment (scanning the QR code) is always done by the user from their own profile.
If a user gets locked out by repeated failed sign-ins (wrong password, wrong code, or wrong recovery code), the account enters a temporary cooldown and, after enough consecutive failures, is automatically disabled. Re-enable it from the User Sign-In Status card on the same page (this also clears the failure counter); a successful sign-in clears it too.
Note
The Export Users CSV does not include two-factor status; check the per-user detail page. Only full account administrators can change the account-wide sign-in-verification settings, but Manage user accounts delegates can perform the per-user reset.
Searching and Filtering Users
Use the search box to find specific users by:
- Name
- Email address
- Status (active/disabled)